Mastering the Art: How to Cook Perfect Steak Every Time
August 24, 2026 16 min read 3,115 words
Transform your home kitchen into a steakhouse and impress everyone with perfectly cooked, juicy steak.
Start Cooking Now
Understanding Steak Cuts and Quality for Optimal Flavor
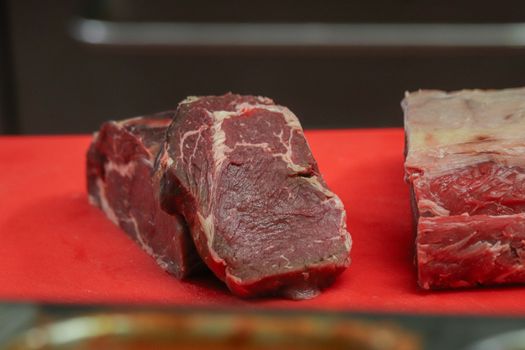 Photo: Boys in Bristol Photography / Pexels
The journey to
how to cook perfect steak begins long before you even turn on the stove; it starts with selecting the right cut of meat. The vast array of options in your local butcher shop or supermarket can be overwhelming, but understanding the characteristics of popular steak cuts is fundamental to achieving your desired outcome. Each cut offers a unique balance of tenderness, flavor, and texture, influenced by factors such as muscle activity and fat content, known as marbling. Marbling, the intramuscular fat, is a critical indicator of quality. As the steak cooks, this fat renders, basting the meat from within, contributing significantly to its juiciness and rich flavor. Higher marbling generally equates to a more tender and flavorful steak, though it often comes at a higher price point.
Let's delve into some of the most common and beloved steak cuts. The Ribeye, often considered the king of steaks, is celebrated for its abundant marbling and rich, beefy flavor. It comes from the rib section of the cow, an area that doesn't see much muscle activity, contributing to its tenderness. The marbling in a ribeye melts beautifully during cooking, creating an incredibly moist and succulent experience. Next up is the Strip Steak, also known as New York Strip or Kansas City Strip. This cut, from the short loin, offers a good balance of tenderness and flavor with a tighter grain than a ribeye and often a satisfying strip of fat along one edge. It's a favorite for those who appreciate a firmer texture without sacrificing tenderness. The Tenderloin, or Filet Mignon, is renowned for its unparalleled tenderness, living up to its name. It's a very lean cut with minimal marbling, which means it relies heavily on proper cooking techniques to prevent it from drying out. While less intensely flavored than a ribeye or strip, its melt-in-your-mouth texture is highly prized. For those seeking a hearty and flavorful option, the T-Bone and Porterhouse steaks are excellent choices. These cuts are essentially a combination of the tenderloin and the strip, separated by a distinctive T-shaped bone. The Porterhouse is a larger cut with a more substantial portion of the tenderloin, making it ideal for sharing. Finally, flank and skirt steaks, while tougher due to their muscle structure, are packed with flavor and become incredibly tender when marinated and cooked quickly at high heat, often sliced against the grain. Understanding these distinctions empowers you to choose the best steak for your preferences and cooking method, setting the stage for an extraordinary culinary experience. The quality of the meat itself is non-negotiable; seek out prime or choice grades if possible, and don't hesitate to ask your butcher for recommendations. A well-chosen cut is half the battle won in your quest for the perfect steak.
Essential Preparation Techniques for a Flawless Steak
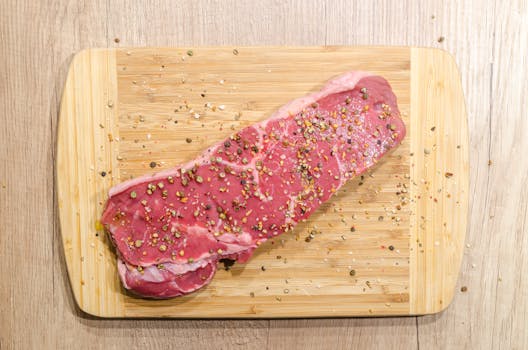 Photo: Lukas Blazek / Pexels
Once you've selected your ideal cut, the preparation phase is where you lay the groundwork for optimal cooking and flavor development. Skipping these crucial steps can compromise even the highest quality steak. The first, and perhaps most overlooked, step is bringing your steak to room temperature. This isn't just a chef's whim; it's a scientific necessity. A cold steak hitting a hot pan will cook unevenly, leading to an overcooked exterior and a cold, undercooked interior. By allowing your steak to sit out for 30-60 minutes (depending on thickness) before cooking, you ensure that the internal temperature is more uniform, promoting even heat penetration and a consistent doneness throughout. This simple act drastically improves your chances of achieving that perfect medium-rare or medium.
Next comes seasoning, a step where simplicity often yields the best results. For a truly great steak, high-quality salt and freshly ground black pepper are often all you need. Coarse sea salt or kosher salt is preferred as it adheres better and provides a more pronounced flavor without being overly salty. Apply a generous amount of salt to all surfaces of the steak. Don't be shy; a significant portion will fall off during cooking, and a good crust requires ample seasoning. The salt not only enhances flavor but also aids in drawing out moisture to form a better crust. Some chefs advocate salting well in advance (up to 24 hours) to allow the salt to penetrate deeper and tenderize the meat, a technique known as dry brining. If you choose this method, pat the steak very dry before cooking. Black pepper should be added just before cooking, as pepper can burn at high temperatures, leading to a bitter taste. While some prefer to add garlic powder, onion powder, or other spices, for a classic steak experience, salt and pepper are king.
Before seasoning, ensure your steak is thoroughly dry. Moisture on the surface of the meat will prevent a proper sear, leading to steaming rather than browning. Use paper towels to pat down every side of the steak until it's as dry as possible. This is critical for achieving that coveted, flavorful crust, often referred to as the Maillard reaction. The Maillard reaction is a complex chemical process that occurs when amino acids and reducing sugars react in the presence of heat, creating hundreds of new flavor compounds and the desirable brown color. Without a dry surface, the energy from your heat source will first evaporate the water, cooling the surface and delaying the browning process. A dry, well-seasoned, room-temperature steak is the canvas upon which you will paint your culinary masterpiece. These preparation steps, though seemingly minor, are the difference between a good steak and an unforgettable one, laying the groundwork for the perfect sear and an evenly cooked interior.
Mastering Cooking Methods for the Ideal Steak Doneness
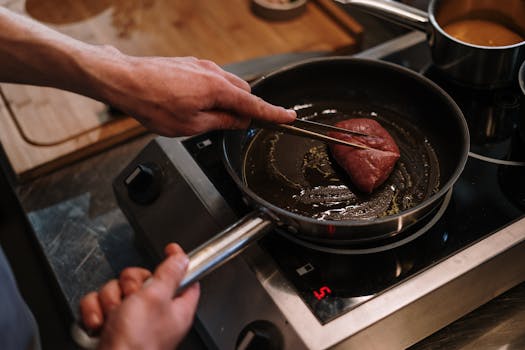 Photo: cottonbro studio / Pexels
With your steak perfectly prepped, it's time to talk heat. The cooking method you choose significantly impacts the final texture and flavor, and understanding the nuances of each will elevate your steak game. The goal is always a beautifully seared crust and an interior cooked precisely to your desired doneness. For most home cooks, the pan-searing method, often followed by a finish in the oven, is the most accessible and effective way to achieve restaurant-quality results.
**Pan-Searing:** This method involves a heavy-bottomed pan, preferably cast iron, heated to screaming hot. Cast iron retains heat exceptionally well, which is crucial for maintaining a consistent high temperature when the steak hits the pan. Add a high smoke point oil, like grapeseed, avocado, or canola oil, to the hot pan. Once the oil shimmers and just begins to smoke, carefully place your dry, seasoned steak in the pan. Do not overcrowd the pan; cook steaks one at a time or in batches if necessary, to avoid dropping the pan's temperature. Sear the steak for 2-4 minutes per side, depending on thickness, until a deep, dark brown crust forms. This initial high-heat sear develops incredible flavor and texture. For thicker steaks (1.5 inches or more), after searing both sides, you can transfer the pan directly to a preheated oven (375-400°F) to finish cooking. This allows for more even cooking through the center without burning the exterior. Alternatively, you can reduce the heat on the stovetop and continue cooking, flipping every minute or so, for thinner cuts.
**Grilling:** For those who love the smoky char, grilling is an excellent option. Preheat your grill to high heat, ensuring the grates are clean and oiled to prevent sticking. Place the seasoned steak directly over the hottest part of the grill to achieve a good sear, typically 2-3 minutes per side. Then, move the steak to a cooler part of the grill or lower the heat to finish cooking to your desired doneness. The grill marks are a bonus, but the even crust across the entire surface is what truly matters for flavor.
**Reverse Sear:** This method is gaining popularity for its ability to produce incredibly even doneness from edge to edge, especially for thicker cuts. It involves cooking the steak slowly at a low temperature in the oven (250-275°F) until it's about 10-15 degrees below your target internal temperature. This can take anywhere from 30 minutes to an hour or more, depending on thickness. Once it reaches the desired internal temperature, remove it from the oven, pat it dry, and then sear it quickly in a screaming hot pan or on a hot grill for 1-2 minutes per side to develop that beautiful crust. This method minimizes the gray band often seen in traditionally cooked steaks.
Regardless of the method, a meat thermometer is your best friend for achieving perfect doneness. Visual cues can be misleading, but an accurate thermometer takes out all the guesswork. Insert the thermometer into the thickest part of the steak, avoiding bone. Remember, the steak's internal temperature will rise by a few degrees even after it's removed from the heat (carryover cooking), so pull it off just before it reaches your target. For medium-rare, aim for 125-130°F; for medium, 130-135°F; and for medium-well, 135-140°F. A final, crucial step after cooking, regardless of method, is to rest the steak. Tent it loosely with foil and let it sit for 5-10 minutes. This allows the juices, which have been driven to the center during cooking, to redistribute throughout the meat, resulting in a more tender and flavorful bite. Slicing too early will cause those precious juices to spill out onto your cutting board, leaving you with a drier steak.
Perfectly cooked steak is a blend of science and art, and mastering these methods will ensure a delicious outcome every time.
Common Steak Cooking Mistakes to Avoid and Expert Tips
Photo: Lukas Blazek / Pexels
Even with the best intentions and highest quality ingredients, several common pitfalls can derail your quest for the perfect steak. Being aware of these mistakes and implementing expert tips will significantly improve your success rate.
**Common Mistakes to Avoid:**
* **Cooking a cold steak:** As discussed, this leads to uneven cooking. Always bring your steak to room temperature before hitting the heat.
* **Not drying the steak:** Moisture is the enemy of a good sear. Pat your steak thoroughly dry to encourage the Maillard reaction and a crispy crust.
* **Under-seasoning:** A bland steak is a sad steak. Be generous with salt and pepper, ensuring all surfaces are covered.
* **Overcrowding the pan:** This drops the pan's temperature, leading to steaming instead of searing. Cook in batches if necessary.
* **Flipping too often:** Resist the urge to constantly flip. Allow the steak to develop a good crust on each side before turning, especially during the initial sear.
* **Cooking at too low a temperature:** High heat is essential for searing. A lukewarm pan will result in a gray, unappetizing exterior.
* **Not using a meat thermometer:** Guessing doneness is a recipe for disappointment. Invest in an instant-read thermometer for accuracy.
* **Skipping the rest:** This is arguably the most critical mistake. Resting allows juices to redistribute, ensuring a tender and moist steak. Cutting too soon will result in dry meat.
* **Slicing with the grain:** For tougher cuts like flank or skirt steak, always slice against the grain to shorten muscle fibers and maximize tenderness.
**Expert Tips for Elevating Your Steak:**
* **Butter Basting:** Towards the end of cooking (especially with pan-searing), add a knob of butter, a few sprigs of fresh herbs (like rosemary or thyme), and a crushed garlic clove to the pan. Tilt the pan and spoon the melted, aromatic butter over the steak repeatedly. This infuses incredible flavor and helps create an even more beautiful crust.
* **Use a Heavy-Bottomed Pan:** Cast iron is ideal for its heat retention and even heating, which is crucial for a consistent sear.
* **Consider Compound Butters:** Prepare a compound butter in advance (e.g., garlic-herb butter) and place a pat on the steak as it rests. The melting butter will add another layer of flavor.
* **Deglaze the Pan:** After removing the steak, you can deglaze the pan with a splash of wine, broth, or even water to create a quick, flavorful pan sauce. Scrape up all the browned bits (fond) from the bottom of the pan – that's where the flavor is!
* **Slice Against the Grain:** For optimal tenderness, especially with cuts like flank, skirt, or even strip steak, always slice against the grain. This shortens the muscle fibers, making each bite more tender and easier to chew.
* **Practice Makes Perfect:** Like any culinary skill, cooking steak improves with practice. Don't be discouraged by initial attempts; learn from each experience and adjust your technique.
* **Listen to Your Steak:** A sizzling sound tells you the pan is hot enough. The smell of browning meat is a good sign. Understanding these sensory cues will help you gauge progress without constantly poking or prodding. By internalizing these tips and diligently avoiding common mistakes, you'll be well on your way to consistently producing steaks that rival those from the finest steakhouses, making every meal a celebration.
