Master how to make homemade pasta from scratch
July 26, 2026 16 min read 3,270 words
Transform simple ingredients into delicious, authentic fresh pasta with our step-by-step guide.
Start Rolling Today!
The Essential Ingredients for Perfect Homemade Pasta Dough
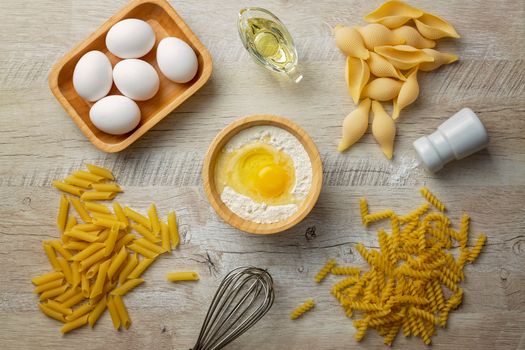 Photo: Marcelo Verfe / Pexels
Embarking on the journey of how to make homemade pasta from scratch begins with understanding its fundamental building blocks: flour, eggs, and sometimes a touch of water or olive oil. While seemingly simple, the quality and type of these ingredients significantly impact the final texture, flavor, and workability of your pasta. Let's delve into each component to ensure your pasta-making adventure starts on the right foot.
First and foremost, flour is the backbone of any pasta dough. The most traditional and often recommended flour for fresh egg pasta is '00' flour. This Italian-milled flour is incredibly fine and has a moderate protein content, which results in a silky-smooth, tender, yet resilient pasta that holds sauces beautifully. Its fine texture absorbs liquids evenly, making for a more consistent dough. However, if '00' flour isn't readily available, all-purpose flour can certainly be used. Opt for an unbleached all-purpose flour, as bleached versions can sometimes affect the dough's elasticity. While all-purpose flour might yield a slightly chewier texture compared to '00' flour, it still produces delicious results. For those seeking a richer, more rustic flavor profile, a blend of all-purpose flour and durum wheat semolina flour can be fantastic. Semolina, with its higher protein content and coarser texture, adds a wonderful chewiness and a beautiful golden hue to the pasta. A common ratio is 70% '00' or all-purpose flour to 30% semolina, but feel free to experiment to find your preference. Always measure your flour accurately, preferably by weight, as volume measurements can vary significantly.
Next, we have eggs, the vital ingredient that provides richness, color, and structure to fresh pasta. The number and size of eggs you use will directly influence the dough's hydration and elasticity. For a standard recipe using 2 cups of flour (approximately 240-250 grams), two large eggs are a good starting point. However, factors like the humidity in your kitchen, the specific brand of flour, and even the size of your eggs can necessitate minor adjustments. Some recipes call for whole eggs, while others might use a combination of whole eggs and extra yolks for an even richer, more tender pasta. Extra yolks contribute to a more vibrant yellow color and a silkier mouthfeel. Always use fresh, good-quality eggs; farm-fresh eggs with deep orange yolks will impart an unparalleled color and flavor to your pasta. If your dough feels too dry, you can add a tiny bit of water or an extra egg yolk, one teaspoon at a time, until the desired consistency is reached. Conversely, if it's too wet, dust in a little more flour.
Finally, water and olive oil are sometimes included, though less common in traditional egg pasta recipes. A splash of water can be added if the dough is too stiff or crumbly, especially when using flours with higher protein content or in very dry climates. Olive oil, typically extra virgin, can be added for a subtle flavor and to make the dough a bit more pliable and easier to work with. It also contributes to a slightly smoother texture. However, for classic egg pasta, eggs alone often provide enough moisture and richness. The beauty of homemade pasta lies in its adaptability. Don't be afraid to adjust these ratios slightly based on how your dough feels. The goal is a dough that is firm, elastic, and smooth, not sticky or overly dry. Understanding these ingredients is the first crucial step in mastering
the art of pasta making. With the right foundation, you're well on your way to creating culinary masterpieces.
Mastering the Art of Kneading and Resting Pasta Dough
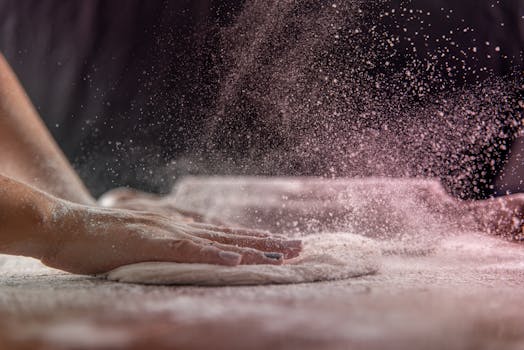 Photo: ricardo rojas / Pexels
Once your essential ingredients are combined, the next critical phases in how to make homemade pasta from scratch are kneading and resting the dough. These two steps are paramount for developing the gluten structure that gives pasta its characteristic chewiness and elasticity, ensuring it holds its shape during cooking and absorbs sauce beautifully. Neglect either of these steps, and you risk a tough, brittle, or difficult-to-work-with dough.
Kneading is where the magic truly happens. When flour and liquid (eggs in this case) are combined and worked, the proteins in the flour, gliadin and glutenin, begin to link together, forming gluten strands. This network of gluten is what gives dough its strength and elasticity. The goal of kneading is to develop this network sufficiently. You can knead pasta dough by hand, using a stand mixer with a dough hook, or even a food processor for initial mixing. For hand kneading, clear a clean, lightly floured surface. Start by pushing the dough away from you with the heels of your hands, then fold it back towards you, rotate, and repeat. This rhythmic motion stretches and develops the gluten. It's a workout, but a rewarding one! Expect to knead for 8 to 10 minutes, or even up to 15 minutes, until the dough transforms from a shaggy, somewhat sticky mass into a smooth, elastic, and uniform ball. A good test for readiness is the 'windowpane test': pinch off a small piece of dough and gently stretch it. If you can stretch it thin enough to see light through it without it tearing, your gluten is well-developed. The dough should feel firm but pliable, not sticky.
After the intensive kneading, the dough needs to rest. This step is often overlooked but is absolutely crucial. Resting the dough allows the gluten strands, which have become tight and tense during kneading, to relax. If you try to roll out dough immediately after kneading, you'll find it springs back constantly, making it incredibly difficult to achieve a thin, even sheet. The minimum resting time is 30 minutes, but an hour is even better, especially if you're aiming for very thin pasta. To rest the dough, form it into a smooth ball, lightly dust it with flour if needed, then wrap it tightly in plastic wrap or place it in an airtight container. This prevents the dough from drying out and forming a crust, which would make it brittle and hard to roll. Place it at room temperature, not in the refrigerator, unless you plan to rest it for several hours or overnight. If resting for an extended period in the fridge, bring it back to room temperature for about 30 minutes before rolling.
During the resting period, the flour also continues to hydrate evenly, resulting in a more consistent texture throughout the dough. You'll notice a remarkable difference in the dough's pliability after resting – it will be much softer, more extensible, and a joy to work with. This relaxation of gluten is what enables you to roll out beautifully thin sheets without excessive effort or tearing. Both diligent kneading and a patient rest are non-negotiable steps for achieving that perfect, tender-chewy texture in your homemade pasta, making your efforts in how to make homemade pasta from scratch truly worthwhile.
Rolling and Shaping Your Homemade Pasta: From Sheet to Strand
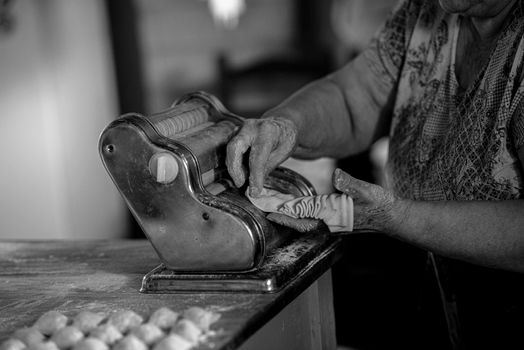 Photo: Natalia Olivera / Pexels
With your perfectly kneaded and rested dough ready, the next exhilarating stage in how to make homemade pasta from scratch is rolling and shaping. This is where your culinary creation truly comes to life, transforming a humble ball of dough into delicate sheets and intricate shapes. Whether you opt for the traditional rolling pin or the efficiency of a pasta machine, precision and patience are key to achieving that coveted al dente bite and elegant appearance.
If you're using a rolling pin, prepare a clean, lightly floured surface. Divide your dough into manageable portions (usually quarters or halves, depending on the total dough amount). Flatten one portion into a disc, keeping the others covered to prevent drying. Begin rolling from the center outwards, rotating the dough frequently and flipping it over occasionally to ensure even thickness. The goal is to roll the dough as thinly as possible – thin enough to almost see your hand through it. This requires some elbow grease and persistence, but the reward of a perfectly thin, delicate pasta sheet is immense. If the dough springs back, cover it and let it rest for another 10-15 minutes to allow the gluten to relax further before continuing.
For those with a pasta machine, this process becomes significantly easier and more consistent. Start by flattening a dough portion into a rectangle that will fit through the widest setting of your machine. Pass the dough through this setting, then fold it into thirds (like a letter) and pass it through again. Repeat this folding and passing 2-3 times at the widest setting; this acts as a final kneading, further refining the dough's texture and elasticity. After this, begin progressively reducing the roller setting, passing the dough through each setting once or twice, without folding, until you reach your desired thickness. For most pasta types, settings 6 or 7 (out of 9 for many machines) are ideal, resulting in a thin, translucent sheet. Always dust the dough lightly with flour between passes to prevent sticking, but avoid over-flouring, which can dry out the pasta. Keep the unrolled dough covered to maintain its moisture.
Once you have your thin pasta sheets, it's time for shaping. For classic long pasta like fettuccine, tagliatelle, or linguine, you can use the cutting attachments of your pasta machine or cut by hand. If cutting by hand, lightly flour the sheet, then loosely roll it up like a scroll. Using a sharp knife, slice the roll into your desired width (e.g., 1/4 inch for fettuccine, 1/2 inch for tagliatelle). Gently unroll the strands and toss them with a little semolina flour to prevent sticking. For shapes like ravioli or tortellini, you'll need to cut squares or circles and fill them with your chosen
delicious fillings. For more rustic shapes like orecchiette or cavatelli, small pieces of dough are pressed and rolled with a thumb or gnocchi board. As you cut and shape, lay the pasta on a lightly floured baking sheet or hang it on a pasta drying rack. If cooking immediately, a short drying time (15-30 minutes) helps the pasta firm up, preventing stickiness and maintaining shape. If storing, allow it to dry completely for several hours or overnight before freezing or refrigerating. This stage is truly transformative, turning simple ingredients into a beautiful culinary canvas, all part of the rewarding process of how to make homemade pasta from scratch.
Essential Tips for Cooking and Storing Your Fresh Homemade Pasta
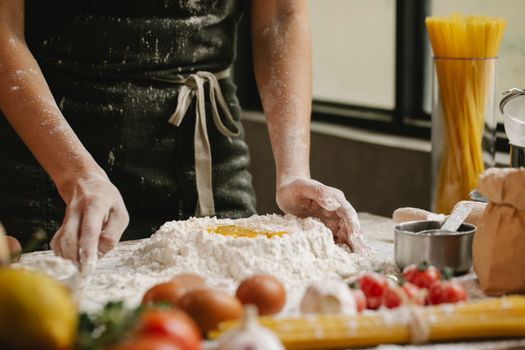 Photo: Klaus Nielsen / Pexels
You've put in the effort to master how to make homemade pasta from scratch, and now it's time for the grand finale: cooking and, if necessary, storing your culinary masterpiece. The way you handle your fresh pasta in these final stages can make all the difference between a good dish and an extraordinary one. Fresh pasta behaves differently from its dried counterparts, so a few key adjustments are necessary to ensure perfection.
**Cooking Your Fresh Pasta:**
* **Plenty of Water:** Always use a large pot of heavily salted boiling water. The general rule of thumb is 1 gallon of water and 1 tablespoon of salt per pound of pasta. This allows the pasta to move freely and prevents it from clumping together. The salt not only seasons the pasta from within but also raises the boiling point slightly, leading to more efficient cooking.
* **Boiling Vigorously:** Ensure the water is at a rolling boil before adding the pasta. This helps to set the pasta quickly and maintain its texture.
* **Cook Time is Key:** Fresh pasta cooks incredibly fast! Unlike dried pasta which can take 8-12 minutes, fresh pasta typically cooks in 2-4 minutes, sometimes even less for very thin varieties. Start tasting after 90 seconds. You're looking for an 'al dente' texture – tender but with a slight bite to it. Overcooked fresh pasta can become gummy and lose its delicate texture.
* **Don't Rinse:** Never rinse fresh pasta after cooking. Rinsing washes away the starchy film on the pasta, which is essential for helping your sauce adhere properly. Instead, use tongs or a spider strainer to transfer the pasta directly from the boiling water to your pre-heated sauce.
* **Pasta Water is Gold:** Reserve some of the starchy pasta cooking water. This liquid is a secret weapon for emulsifying your sauce, helping it cling to the pasta, and achieving a silky consistency. Add it spoonful by spoonful to your sauce as you toss it with the pasta.
**Storing Your Homemade Pasta:**
* **Immediate Use:** For the best flavor and texture, cook fresh pasta within an hour or two of making it. If you've just shaped it, let it air-dry on a lightly floured surface or a pasta drying rack for about 15-30 minutes before cooking. This helps it firm up and prevents stickiness.
* **Refrigeration:** If you won't be cooking it immediately, fresh pasta can be stored in the refrigerator for 1-2 days. Lightly dust the pasta with semolina flour (this is crucial to prevent sticking), then coil it into small nests or lay it flat on a floured baking sheet. Cover tightly with plastic wrap to prevent drying out. Cook directly from the fridge, adding an extra minute or so to the cooking time.
* **Freezing for Longer Storage:** For longer storage (up to 1 month), freezing is your best option. Again, lightly dust the pasta with semolina flour and form it into small nests or lay it flat on a baking sheet lined with parchment paper. Flash freeze it until solid (about 30 minutes to 1 hour). Once frozen solid, transfer the pasta to an airtight freezer bag or container. This prevents freezer burn and keeps the pasta from sticking together. Cook frozen pasta directly from the freezer; do not thaw. It will take slightly longer to cook than fresh pasta, typically 4-6 minutes.
By following these cooking and storage guidelines, you'll ensure that every strand of your homemade pasta is enjoyed at its absolute best, a testament to your dedication in learning how to make homemade pasta from scratch.
