✓ Sourdough starter is a living culture of wild yeast and bacteria.
✓ It requires only flour and water to create and maintain.
✓ The process typically takes 5-7 days to establish an active starter.
✓ Regular feeding is crucial for a healthy, vibrant starter.
How It Works
1
Combine Flour and Water
Mix equal parts whole wheat flour and filtered water in a clean jar. This creates the initial environment for wild yeast to colonize.
2
Daily Feeding Cycle
Discard most of the starter and feed the remainder with fresh flour and water daily. This strengthens the yeast and bacteria populations.
3
Observe Activity
Look for consistent bubbles, a pleasant sour aroma, and growth after feeding. These are signs your starter is becoming active and ready.
4
Maturity and Maintenance
Once consistently active, your starter is mature enough for baking. Continue regular feedings to keep it healthy, storing it in the fridge between uses.
Understanding the Magic Behind Your Sourdough Starter
Photo: turek / Pexels
Embarking on the journey of how to make sourdough bread starter is more than just mixing flour and water; it's about cultivating a living ecosystem. At its heart, a sourdough starter is a symbiotic culture of wild yeasts and lactic acid bacteria (LAB) that exist naturally in flour, air, and even on our hands. These microscopic organisms work together to ferment sugars in the flour, producing carbon dioxide (which creates those beautiful air pockets in your bread) and organic acids (which give sourdough its distinctive tangy flavor and improve its shelf life). Unlike commercial yeast, which is a single strain of domesticated yeast designed for rapid and predictable rising, a sourdough starter offers a complex microbial community that contributes to a more nuanced flavor profile and often a more digestible bread. Think of it as a pet that requires consistent care and attention, but rewards you with unparalleled culinary delights. The quality of your ingredients plays a significant role here. Opt for unbleached, organic flours if possible, as they tend to contain more of the wild microbes needed to kickstart your culture. Filtered or unchlorinated water is also paramount, as chlorine can inhibit the growth of beneficial bacteria and yeast. Understanding this fundamental science helps demystify the process and empowers you to troubleshoot any issues that may arise. It’s a process of observation, patience, and learning to read the subtle cues your starter provides. The initial days are all about encouraging these beneficial organisms to multiply and thrive, outcompeting any undesirable microbes. This delicate balance is why consistency in feeding and temperature is so important. As your starter matures, you'll notice a distinct change in its aroma, texture, and activity, signaling its readiness to transform simple ingredients into extraordinary bread. Exploring different types of flour can also impact your starter's flavor and vigor, offering endless possibilities for experimentation in your sourdough journey.
Gathering Your Essential Tools and Ingredients
Photo: Guillermo Berlin / Pexels
Before you even think about how to make sourdough bread starter, preparation is key. The beauty of sourdough is its simplicity, requiring only a few basic items you likely already have in your kitchen. First, you'll need a suitable container. A glass jar, ideally with straight sides and a wide mouth, is perfect. A 1-quart (liter) size is a good starting point, as it provides enough space for expansion and makes stirring easy. Avoid narrow-necked jars, which can be difficult to clean and monitor. While you'll need a lid, it shouldn't be airtight; fermentation produces gases that need to escape. A loose-fitting lid, a piece of plastic wrap, or even a breathable cloth secured with a rubber band will suffice. Next, accurate measurements are crucial, especially in the early stages. A digital kitchen scale is highly recommended for precise flour and water ratios. While volumetric measurements (cups) can work, weight measurements are more consistent and reliable, leading to a more stable starter. You'll also need a non-reactive stirring utensil, such as a wooden spoon or silicone spatula. Metal is generally fine, but some purists prefer non-metal to avoid any potential, albeit unlikely, reactions. Now for the star ingredients: flour and water. For the initial creation, many bakers recommend starting with whole wheat flour. Whole wheat flour contains a higher concentration of beneficial microbes and nutrients, giving your starter a robust kickstart. Organic whole wheat flour is often preferred for its natural microbial diversity. Once established, you can transition to all-purpose or bread flour for maintenance, or continue with whole wheat for a more active, tangy starter. As for water, filtered, unchlorinated water is essential. Tap water often contains chlorine or chloramines, which are sanitizers designed to kill microbes – precisely what you're trying to cultivate in your starter. If you don't have a filter, you can let tap water sit out in an open container for 24 hours to allow the chlorine to dissipate. Avoid distilled water, as it lacks the minerals that yeasts and bacteria need to thrive. Having these simple tools and quality ingredients on hand sets the stage for a successful and vibrant sourdough starter.
Step-by-Step Guide: Cultivating Your First Sourdough Starter
Photo: Anh Nguyen / Pexels
Now, let's dive into the practical steps of how to make sourdough bread starter. Remember, patience is your most important ingredient. This process typically takes 5-7 days, but can vary based on ambient temperature and flour type.
**Day 1: The Inaugural Mix**
In your clean glass jar, combine 50 grams (about 1/4 cup) of whole wheat flour with 50 grams (about 1/4 cup) of filtered water. Mix thoroughly until no dry spots remain and the mixture forms a thick paste. Scrape down the sides of the jar, cover loosely, and place it in a warm spot (ideally 70-78°F or 21-26°C). A consistent temperature is vital for active fermentation. Mark the initial level on the jar with a rubber band or marker so you can track its growth.
**Day 2: First Signs of Life**
On day 2, you might not see much activity, or you might notice a few tiny bubbles. This is normal. Your starter is just waking up. Discard about half of the starter (approximately 50 grams), leaving 50 grams in the jar. Add 50 grams of fresh whole wheat flour and 50 grams of filtered water. Mix well, cover loosely, and return to your warm spot. Discarding is crucial; it removes spent food and makes space for fresh nutrients, preventing the starter from becoming too acidic too quickly.
**Days 3-4: Increased Activity and Feeding**
By day 3, you should start seeing more consistent bubbling and possibly some growth after feeding. You might also notice a slightly yeasty or even mildly unpleasant smell (like gym socks or nail polish remover). Don't worry, this is often a temporary phase as different microbial populations compete. Continue the feeding routine: discard all but 50 grams, then feed with 50 grams whole wheat flour and 50 grams water. Repeat this on day 4. You should see more robust bubbling and a more pleasant, faintly sour aroma emerging.
**Days 5-7: Maturation and Regular Feeding Cycle**
At this stage, your starter should be consistently active. After feeding, it should double in size within 4-8 hours, be full of bubbles, and smell pleasantly yeasty and sour, like ripe fruit or yogurt. This is your cue that the wild yeasts and bacteria are thriving. From now on, you can transition to a more refined flour if you wish, such as unbleached all-purpose or bread flour, or continue with whole wheat. The feeding ratio can also be adjusted. For maintenance, a 1:1:1 ratio (starter:flour:water by weight) is common. For example, if you keep 50g of starter, feed it with 50g flour and 50g water. Continue feeding once or twice a day until your starter consistently doubles in size, smells good, and passes the float test (a small spoonful floats in water). Once mature, your starter is ready for baking! You can then transition to storing it in the refrigerator between bakes, which slows down its metabolism and reduces the frequency of feedings. Learning to assess the readiness of your starter is a skill that comes with practice and observation, but these guidelines provide a solid foundation for success.
Troubleshooting Common Sourdough Starter Issues and Tips for Success
Photo: Jill Wellington / Pexels
Even with the best intentions, your sourdough starter might throw you a curveball. Here are some common issues and how to address them, along with essential tips for maintaining a robust starter.
**Common Issues & Solutions:**
* **No Activity/Slow Growth:** This is often due to cold temperatures or insufficient feeding. Try moving your starter to a warmer spot (e.g., on top of the fridge, near a pilot light, or in a proofing box). Ensure your water isn't chlorinated. Increase the frequency of feedings to twice a day if it's very sluggish, or switch back to whole wheat flour for a few feedings to give it a boost.
* **Foul Odor (Acetone/Nail Polish Remover):** This usually indicates your starter is very hungry and producing alcohol. It's a sign that the beneficial microbes are struggling. Increase feeding frequency, ensure you're discarding enough old starter, and make sure it's in a warm enough environment to encourage yeast activity.
* **Mold:** This is the most serious issue. If you see any fuzzy, colored mold (black, green, pink, blue), unfortunately, you'll need to discard the entire starter and begin again. Mold is usually caused by contamination, often from unclean jars or very weak initial cultures. Always use clean utensils and jars.
* **Hooch (Dark Liquid on Top):** Hooch is a liquid byproduct of fermentation. A thin layer of clear or pale brown hooch is normal and simply means your starter is hungry. Stir it back in before feeding. Dark, black, or red hooch indicates a very hungry, neglected starter. Discard the hooch, then feed as usual, potentially increasing feeding frequency for a few days to revive it.
**Tips for Success:**
* **Consistency is Key:** Try to feed your starter at roughly the same time each day. This creates a routine for the microbes.
* **Temperature Matters:** Aim for a consistent ambient temperature between 70-78°F (21-26°C). Fluctuations can stress your starter.
* **Don't Be Afraid to Discard:** Discarding seems wasteful, but it's essential. It removes spent food, reduces acidity, and concentrates the beneficial microbes, ensuring a healthy and active starter.
* **Listen to Your Starter:** Pay attention to its smell, texture, and rise. These are your best indicators of its health and readiness.
* **Keep it Hydrated:** If your starter seems too thick, add a tiny bit more water; if too thin, a bit more flour. The consistency should be like a thick pancake batter.
* **Name Your Starter:** Giving your starter a name often makes you more invested in its care, fostering a more hands-on approach to this living ingredient. This personal touch can make the learning process more enjoyable and less intimidating.
By understanding these common pitfalls and adopting these best practices, you'll be well on your way to maintaining a vigorous and reliable sourdough starter for years to come.
Comparison
Feature
Sourdough Starter
Commercial Yeast
Baking Soda/Powder
Leavening Agent
Wild Yeast & Bacteria
Saccharomyces cerevisiae
Chemical Reaction
Flavor Profile
Complex, Tangy, Sour
Mild, Yeasty
Neutral
Digestion
Improved
Standard
Standard
Time to Rise
Long (4-12+ hours)
Fast (1-2 hours)
Instant
Maintenance
Daily/Weekly feeding
Dry storage
Dry storage
Shelf Life
Indefinite (with care)
1-2 years (unopened)
6-12 months
What Readers Say
★★★★★
"This guide on how to make sourdough bread starter was incredibly detailed and easy to follow. My starter, 'Bubbly Betty,' is now thriving, and I'm already baking my first loaves!"
Sarah J. · Portland, OR
★★★★★
"I'd tried making a starter before and failed. This article explained the 'why' behind each step, making all the difference. My starter is vigorous and smells amazing after just 6 days."
Mark D. · Austin, TX
★★★★★
"Following these instructions, I successfully created a robust sourdough starter that consistently doubles in size. It's so rewarding to bake bread from my own homemade culture."
Emily R. · Denver, CO
★★★★★
"The guide was mostly excellent, though I found the initial days a bit slow in my colder kitchen. Once I moved it to a warmer spot, it really took off. Great tips on troubleshooting."
David L. · Chicago, IL
★★★★★
"As someone new to baking, the thought of how to make sourdough bread starter was daunting. This resource broke it down into manageable steps, and now I'm hooked!"
Jessica M. · Miami, FL
Frequently Asked Questions
What kind of flour is best to start a sourdough starter?
While you can use various flours, unbleached whole wheat flour is highly recommended for starting your sourdough starter. It contains a higher concentration of beneficial wild yeasts and bacteria, which helps kickstart the fermentation process more effectively than refined flours.
My starter isn't bubbling much, is it dead?
Not necessarily! Lack of bubbles can be due to several factors, including a cool environment, insufficient feeding, or just being in the early stages of development. Ensure your starter is in a warm spot (70-78°F), feed it consistently, and give it more time. It's rarely 'dead' unless you see mold.
How often should I feed my sourdough starter?
During the initial creation phase, you should feed your starter daily. Once mature and active, if stored at room temperature, it typically needs feeding once or twice a day. If refrigerated, it can be fed once a week, but remember to revive it with a few room-temperature feedings before baking.
Is it expensive to make and maintain a sourdough starter?
No, it's very economical! The initial cost is just a bag of flour and some water. Compared to buying commercial yeast repeatedly, a sourdough starter is a one-time investment that, with proper care, can last indefinitely, saving you money in the long run.
How does sourdough starter compare to commercial yeast for baking?
Sourdough starter provides a more complex flavor profile (tangy, sour) and improved digestibility due to its unique microbial composition. Commercial yeast offers a faster, more predictable rise and a milder, more yeasty flavor. Sourdough baking is a slower, more artisanal process with richer results.
Who should make a sourdough starter?
Anyone interested in natural fermentation, those seeking a more flavorful and potentially healthier bread, or home bakers looking to elevate their skills should consider making a sourdough starter. It's a rewarding project for patient individuals who enjoy the process as much as the product.
Is it safe to eat bread made with a homemade sourdough starter?
Yes, it is absolutely safe, provided your starter is healthy and free of mold. The fermentation process actually makes the bread more digestible and can even enhance nutrient availability. Always discard a starter if you see any signs of fuzzy, colored mold.
What are the future trends in sourdough baking?
Future trends include exploring ancient grains and diverse flours for unique starter profiles, integrating sourdough into a wider array of baked goods beyond bread (like pastries and pancakes), and a continued focus on gut health benefits. There's also a growing community around sharing and maintaining heirloom starters.
Mastering how to make sourdough bread starter is a rewarding journey that connects you to an ancient culinary tradition. With patience and observation, you'll cultivate a vibrant living culture that will transform your home baking. Start your sourdough adventure today and savor the unparalleled taste of homemade sourdough bread.

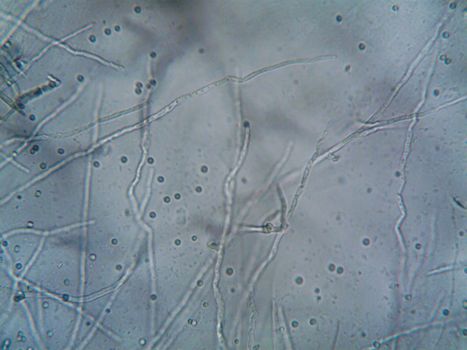 Photo: turek / Pexels
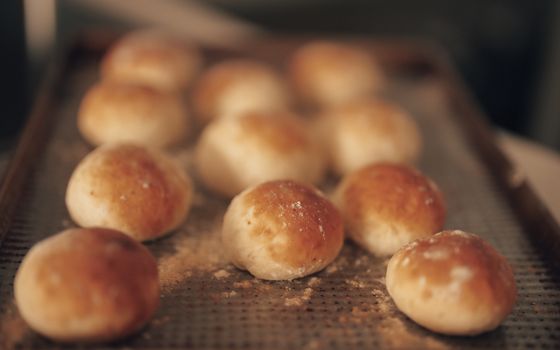 Photo: Guillermo Berlin / Pexels
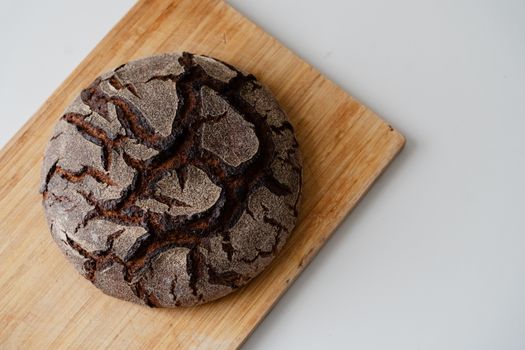 Photo: Anh Nguyen / Pexels
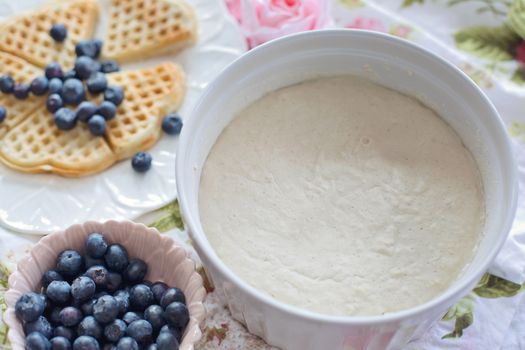 Photo: Jill Wellington / Pexels