✓ Sourdough starter is a living culture of wild yeast and bacteria.
✓ It requires only flour and water, but consistency is key.
✓ A healthy starter typically doubles in size after feeding.
✓ Starters can last indefinitely with proper care and feeding.
How It Works
1
Combine Flour & Water
Mix equal parts flour and water in a clean jar. This initial mixture kickstarts the fermentation process by providing food for wild yeasts.
2
Daily Feeding Routine
Discard most of the starter and feed the remainder with fresh flour and water daily. This replenishes nutrients and encourages yeast and bacteria growth.
3
Observe Activity
Watch for bubbles, a sour aroma, and an increase in volume. These are signs that your starter is becoming active and developing its unique flavor profile.
4
Achieve Peak Readiness
Once your starter consistently doubles in size within 4-8 hours after feeding, it's strong and ready for baking your first delicious sourdough loaf.
Understanding the Magic Behind Your Sourdough Starter
Photo: Natalia Olivera / Pexels
Embarking on the journey of how to make sourdough bread starter is more than just mixing flour and water; it's about cultivating a living, breathing ecosystem right in your kitchen. At its heart, a sourdough starter is a symbiotic culture of wild yeasts and lactic acid bacteria (LAB) that exist naturally in flour and the air around us. These microscopic organisms work together to ferment the sugars in the flour, producing carbon dioxide (which makes your bread rise) and a host of organic acids (which give sourdough its characteristic tangy flavor and improve its keeping qualities). Understanding this fundamental process is the first step to successful sourdough baking.
When you first combine flour and water, you're essentially creating a hospitable environment for these wild microbes. Initially, there might be a variety of microorganisms present, some beneficial, some not. However, over several days of consistent feeding and discarding, the conditions within your jar – particularly the increasing acidity produced by the LAB – favor the growth of the desirable wild yeasts and bacteria. This selective pressure helps to establish a stable and potent culture. Think of it as a microscopic garden where you're nurturing the good plants and weeding out the undesirable ones. The type of flour you choose plays a significant role in this initial stage. While all-purpose flour can work, whole wheat or rye flour often contains a higher concentration of wild yeasts and beneficial bacteria, giving your starter a stronger initial boost. Learn more about different flour types for baking. The water quality is also important; unchlorinated water is best, as chlorine can inhibit microbial growth.
Developing a strong starter takes patience and observation. You'll notice changes in smell, texture, and activity over the first week or two. Early on, you might detect yeasty or even slightly cheesy aromas, which are normal as the microbial community establishes itself. As the LAB take hold, the aroma will become distinctly sour and pleasant, often described as yogurt-like or vinegary. The texture will evolve from a simple paste to a bubbly, aerated mass that expands significantly after feeding. This rise and fall, known as the 'peak,' is a crucial indicator of your starter's strength. A healthy starter will consistently double or even triple in size within a few hours of being fed, creating a dome-like surface with many small bubbles. This robust activity is what gives sourdough bread its incredible rise and open crumb structure. It’s a fascinating process that connects you to ancient baking traditions and provides a unique, living ingredient for your kitchen. The beauty of a sourdough starter is its resilience; once established, it can last for years, becoming a cherished part of your baking routine.
Gathering Your Essentials: What You'll Need to Begin
Photo: Jill Wellington / Pexels
Before you dive into the exciting process of how to make sourdough bread starter, gathering the right tools and ingredients will set you up for success. Fortunately, the list is short and simple, focusing on quality and consistency. You won't need any specialized equipment beyond what you likely already have in your kitchen. First and foremost, you'll need flour. While any unbleached flour can eventually yield a starter, many experienced bakers recommend starting with whole wheat or rye flour for the first few days. These flours are rich in nutrients and contain a higher concentration of naturally occurring wild yeasts and bacteria, giving your starter a robust beginning. After the initial phase, you can transition to unbleached all-purpose or bread flour for daily feedings. The 'unbleached' aspect is crucial, as bleaching agents can inhibit microbial activity.
Next, water is a critical component. Tap water that has been treated with chlorine or chloramines can be detrimental to your starter's delicate microbial ecosystem. It's best to use filtered water, bottled spring water, or simply leave tap water out in an open container for 24 hours to allow the chlorine to dissipate. Avoid distilled water, as it lacks the minerals that yeasts and bacteria need to thrive. You'll also need a suitable container. A glass jar, approximately quart-sized (32 oz) or larger, with a wide mouth is ideal. Glass allows you to easily observe your starter's activity, and a wide mouth makes feeding and mixing straightforward. Avoid airtight containers; your starter needs to breathe. A loose-fitting lid, a piece of plastic wrap, or even a breathable cloth secured with a rubber band will suffice.
Accuracy in measurements is vital, especially in the early stages. A digital kitchen scale is highly recommended for weighing flour and water, as volume measurements (cups) can be inconsistent and lead to varying hydration levels. Weighing ensures precise ratios, which is crucial for maintaining a healthy and active starter. If a scale isn't an option, be extra meticulous with your cup measurements. Lastly, you'll need a non-reactive stirring utensil, such as a rubber spatula or a wooden spoon, to mix your starter. Metal is generally fine, but some purists prefer non-metal. With these simple essentials – quality flour, unchlorinated water, a suitable jar, a kitchen scale, and a stirring utensil – you are fully equipped to embark on your sourdough starter creation journey. These foundational elements ensure you have the best possible start for cultivating a thriving, active starter that will be the heart of your homemade sourdough bread.
Step-by-Step Guide to Cultivating Your Active Sourdough Starter
Photo: Natalia Olivera / Pexels
Creating your own sourdough starter, often affectionately called a 'levain' or 'mother,' is a rewarding process that typically takes about 7 to 14 days. Patience and consistency are your best friends here. Here's a detailed, day-by-day guide on how to make sourdough bread starter from scratch:
**Day 1: The Inaugural Mix**
In a clean, quart-sized glass jar, combine 50 grams (approximately 1/4 cup) of whole wheat or rye flour with 50 grams (approximately 1/4 cup) of unchlorinated water. Mix thoroughly with a rubber spatula until no dry clumps of flour remain. The consistency should be like a thick batter. Cover the jar loosely with its lid, plastic wrap, or a breathable cloth secured with a rubber band. Place it in a warm spot, ideally between 70-78°F (21-25°C), away from direct sunlight. This warmth encourages microbial activity.
**Day 2: First Observations**
By Day 2, you might not see much activity, or you might notice a few small bubbles. You may also detect a faint, somewhat unpleasant smell – this is normal as various bacteria compete. Today, you will *not* feed your starter. Simply give it a good stir, cover it again, and return it to its warm spot. This resting period allows the initial microbial population to establish itself.
**Day 3: Beginning the Feeding Cycle**
Today marks the beginning of your regular feeding routine. Discard all but 50 grams (about 1/4 cup) of your starter. To the remaining 50 grams, add 50 grams of unbleached all-purpose or bread flour and 50 grams of unchlorinated water. Mix well until smooth. Cover loosely and return to its warm spot. You should start to see more consistent bubbling and possibly a slight rise and fall within 12-24 hours after feeding. The smell should start to become more yeasty or slightly sour.
**Day 4-6: Consistent Feeding and Observation**
Continue the feeding routine: every 24 hours, discard all but 50 grams of starter, then feed with 50g flour and 50g water. During these days, you should observe increasing activity. Your starter should become more bubbly, and its volume should start to increase noticeably after feeding, perhaps by 50% or more. The aroma should evolve from yeasty to distinctly sour and pleasant, resembling yogurt or ripe fruit. If you see a thin, dark liquid on top (called 'hooch'), it means your starter is hungry; simply stir it back in before feeding.
**Day 7-14: Achieving Peak Readiness**
By now, your starter should be showing consistent and robust activity. After feeding, it should reliably double (or even triple) in size within 4-8 hours, forming a domed top and being full of bubbles. It should have a pleasant, tangy aroma. To test its readiness, perform the 'float test': drop a small spoonful of starter into a glass of water. If it floats, it's full of carbon dioxide and ready to bake with! If it sinks, it needs another feeding or a little more time to develop strength. Once your starter consistently passes the float test and exhibits strong activity, it's considered 'mature' and ready to make your first loaf of delicious sourdough bread. Remember to continue feeding it regularly, even if you're not baking, to maintain its health and vigor. Consistency is paramount for a thriving starter.
Troubleshooting Common Sourdough Starter Issues & Maintenance Tips
Photo: Jana Ohajdova / Pexels
Even with the best intentions, your sourdough starter might occasionally throw you a curveball. Knowing how to troubleshoot common issues and maintain your starter effectively will ensure its longevity and vitality.
**Common Troubleshooting Scenarios:**
* **Sluggish or Inactive Starter:** If your starter isn't bubbling or rising much after feeding, the most common culprits are temperature, feeding schedule, or flour quality. Ensure your starter is in a warm spot (70-78°F). Try feeding it more frequently (every 12 hours instead of 24) or using a higher ratio of whole grain flour for a few feedings to boost its activity. Sometimes, simply giving it an extra day or two of consistent feeding will perk it up.
* **Foul Odor:** While a healthy starter has a pleasant sour aroma, very strong, unpleasant, or acetone-like smells can indicate an imbalance. This often means it's very hungry. Discard more aggressively (leaving less starter before feeding) and feed with fresh flour and water. Ensure your jar is clean. If mold appears, discard the entire starter and begin anew.
* **Hooch (Dark Liquid on Top):** Hooch is a byproduct of fermentation and indicates your starter is hungry. A light-colored hooch is normal; simply stir it back in before feeding. Darker hooch suggests severe hunger. Stir it in, discard a larger portion than usual, and feed with fresh flour and water. Consider increasing your feeding frequency.
* **Mold:** Any visible mold (fuzzy, colored spots) means your starter is contaminated. Unfortunately, there's no saving it. Discard immediately, thoroughly sanitize your jar, and start over from scratch.
**Maintenance Tips for a Thriving Starter:**
* **Regular Feeding:** Once your starter is mature, if you plan to bake frequently (daily or every few days), keep it on your counter and feed it every 12-24 hours. A common ratio is 1:1:1 (1 part starter, 1 part flour, 1 part water by weight).
* **Refrigeration for Infrequent Bakers:** If you bake less often (once a week or every few weeks), store your fed starter in the refrigerator. This significantly slows down fermentation, reducing the need for frequent feedings. You can feed it once a week or every two weeks. When you're ready to bake, take it out, feed it once or twice at room temperature until it's active again, then use it.
* **Adjusting Hydration:** Most starters are maintained at 100% hydration (equal parts flour and water by weight). You can adjust this slightly based on your preference or recipe requirements. A stiffer starter (less water) ferments slower, while a wetter one ferments faster.
* **Cleanliness:** Always use clean jars and utensils to prevent unwanted bacterial growth.
* **Listen to Your Starter:** Over time, you'll learn to interpret your starter's cues – its smell, its rise, its texture. This intuition is invaluable in keeping it healthy. Don't be afraid to experiment slightly with feeding ratios or temperatures to find what works best in your environment. With a little care, your starter will become a robust and reliable partner in your sourdough baking adventures.
Comparison
Feature
Traditional Sourdough Starter
Commercial Yeast Packet
Sourdough Discard
Cultivation Time
7-14 days
Instant
Not applicable
Flavor Complexity
Deep, tangy, unique
Mild, yeasty
Mildly tangy (unfed)
Ingredients
Flour, Water
Yeast culture
Starter byproduct
Requires Feeding
✓
✗
✗ (for discard recipes)
Shelf Life
Indefinite (with care)
Months (sealed)
Days (refrigerated)
Cost
Very low
Low
None (repurposed)
What Readers Say
★★★★★
"This guide on how to make sourdough bread starter was a game-changer! My previous attempts failed, but the detailed day-by-day instructions here made it incredibly simple. My starter is now super active and smells amazing."
Sarah J. · Austin, TX
★★★★★
"I followed these steps exactly, and within 10 days, I had a thriving sourdough starter. The tips on maintaining it and understanding the smells were particularly helpful. I'm already on my third successful loaf!"
Michael D. · Portland, OR
★★★★★
"I was intimidated by making a starter, but this article explained how to make sourdough bread starter so clearly. My starter, 'Bubbles,' is now two months old and consistently doubles, producing fantastic bread every time."
Emily R. · Chicago, IL
★★★★★
"The guide was very thorough, though my starter took a bit longer than 7 days to become fully active. The troubleshooting section was a lifesaver when I encountered some slow activity. Great resource overall!"
David L. · Denver, CO
★★★★★
"As a beginner baker, I found the instructions on how to make sourdough bread starter incredibly easy to follow. The explanation of why certain steps are important really helped me understand the process, not just follow a recipe."
Jessica M. · Seattle, WA
Frequently Asked Questions
What is the best flour to use when making a sourdough starter?
For the initial few days, whole wheat or rye flour is highly recommended as they contain more wild yeasts and nutrients, giving your starter a stronger start. After the initial phase, you can switch to unbleached all-purpose or bread flour for daily feedings.
My starter isn't bubbling; is it dead?
Not necessarily! Sluggish activity is common, especially in cooler environments or if it's very hungry. Try moving it to a warmer spot (70-78°F), feeding it more frequently (every 12 hours), or using a bit of whole grain flour for a few feedings to boost its activity. Unless you see mold, it's likely just dormant.
How do I know when my sourdough starter is ready to bake with?
Your starter is ready when it consistently doubles or triples in size within 4-8 hours after feeding, is full of bubbles, smells pleasantly sour, and passes the float test (a small spoonful floats in water). This indicates it has enough active yeast to leaven bread.
Is it expensive to make and maintain a sourdough starter?
No, it's very inexpensive! The only ongoing costs are flour and water. A healthy starter, once established, can last indefinitely, making it a very economical way to bake bread compared to buying commercial yeast or loaves.
How does a homemade sourdough starter compare to store-bought yeast?
A homemade sourdough starter provides a complex, tangy flavor and unique texture that commercial yeast cannot replicate. It also offers potential health benefits due to fermentation. Commercial yeast is faster and more consistent but lacks the depth and character of sourdough.
Who should make their own sourdough starter?
Anyone who enjoys baking, is interested in natural fermentation, or wants to create incredibly flavorful and unique bread should consider making a sourdough starter. It's a rewarding project for both novice and experienced bakers.
Is there any risk involved in making a sourdough starter?
The primary risk is contamination with undesirable bacteria or mold, which is rare if you maintain good hygiene (clean jars and utensils). If you see any fuzzy, colored mold, discard the starter immediately and start fresh. Otherwise, it's a very safe process.
What are the future trends for sourdough baking?
Sourdough baking continues to grow in popularity, with trends focusing on using diverse grain flours (e.g., ancient grains), experimenting with different hydration levels for unique crusts and crumbs, and incorporating other fermented ingredients into sourdough recipes. The community aspect of sharing starters and knowledge is also a growing trend.
Now that you know how to make sourdough bread starter, there's nothing stopping you from cultivating your own living leavening agent. Embrace the process, enjoy the journey, and prepare to bake the most flavorful, artisanal bread right in your home kitchen. Your sourdough adventure starts today!

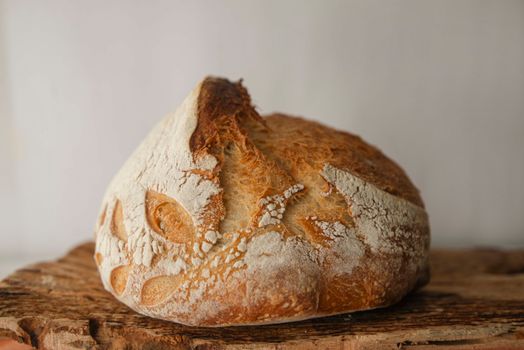 Photo: Natalia Olivera / Pexels
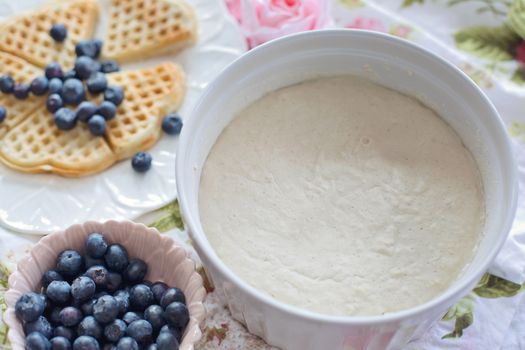 Photo: Jill Wellington / Pexels
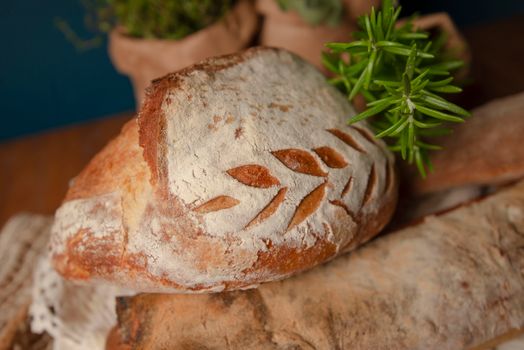 Photo: Natalia Olivera / Pexels
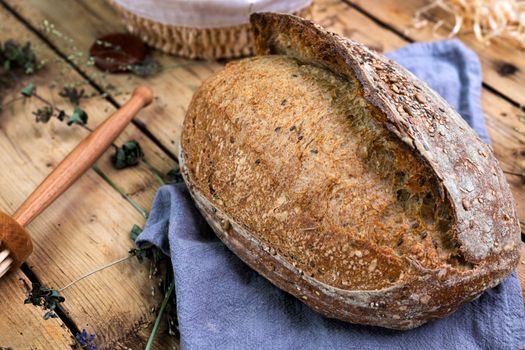 Photo: Jana Ohajdova / Pexels